In this project, we are going to make an RC controlled pontoon with the help of pvc pipe.
Why PVC you may ask well because it is cheap an i would take only few minutes to cut and join into the desired structure.
You can watch the video what the final project will look like.I tested it after my city was hit by cyclone.using PVC is a very cheap and easy way to make projects.
It’s Easy and Cheap
I am not a RC expert so i have made this project by keeping in mind that it should be realy easy and cheap to make.
Important note:- once you have gone through the the process you can join pies as you like to make your own design just make sure its stable first by putting int in water without attaching any electronics.
If you dont have the pipe of my size its OK you can choose little it bigger ones. This project is very flexible.
Before starting this you must have basic knowledge of how to connect a rc controller with brush less motor and esc. It is really easy you can google it i have not included all that as it will make the instructable very big.
Material

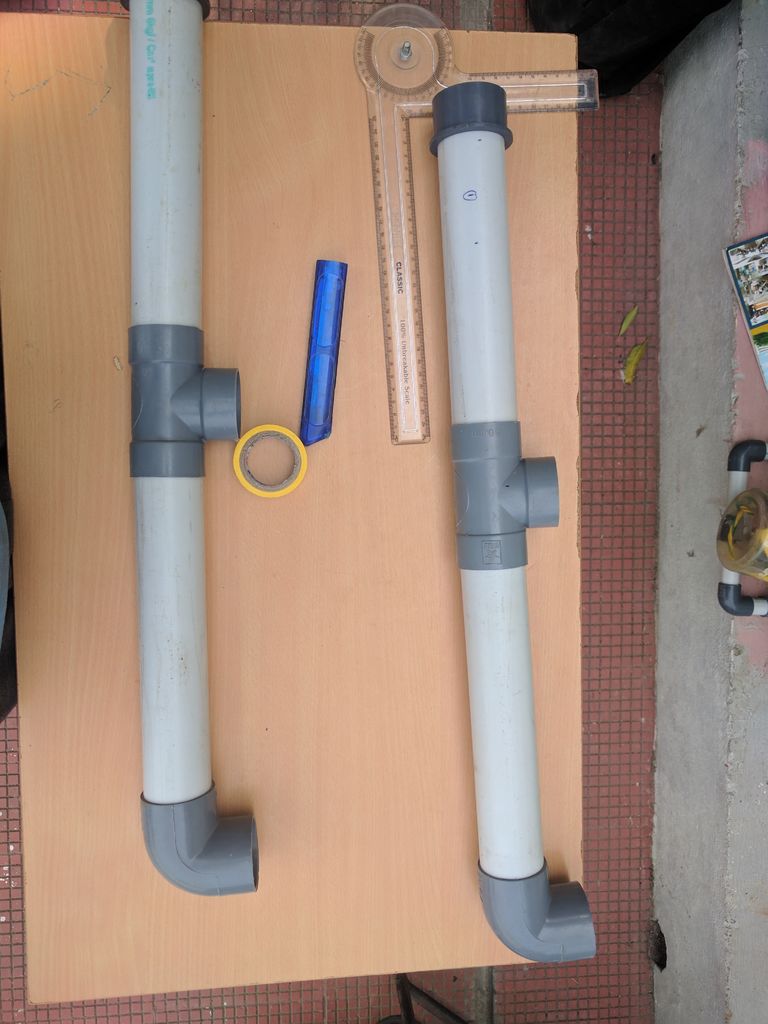
- PVC pipe (you can decide the diameter according to the weight your USV will carry, I have used 55mm and 25mm), T-joints(in my case, 2)
- L-joint (2 for 55mm pipe, this will change according to the pipe diameter you are using)
- L-joint(6 for 25mm pipe)
- 55mm pipe25mm pipeRc transmitter and receiver 2
- brushless motor(2200 kv you can choose less or more6045 quad copter propeller or smaller whichever is avaliable to you
- Lipo battery
- 2 ESC according to your motor rating
Well, you guys can save money on the battery by buying the small capacity one same goes for esc.
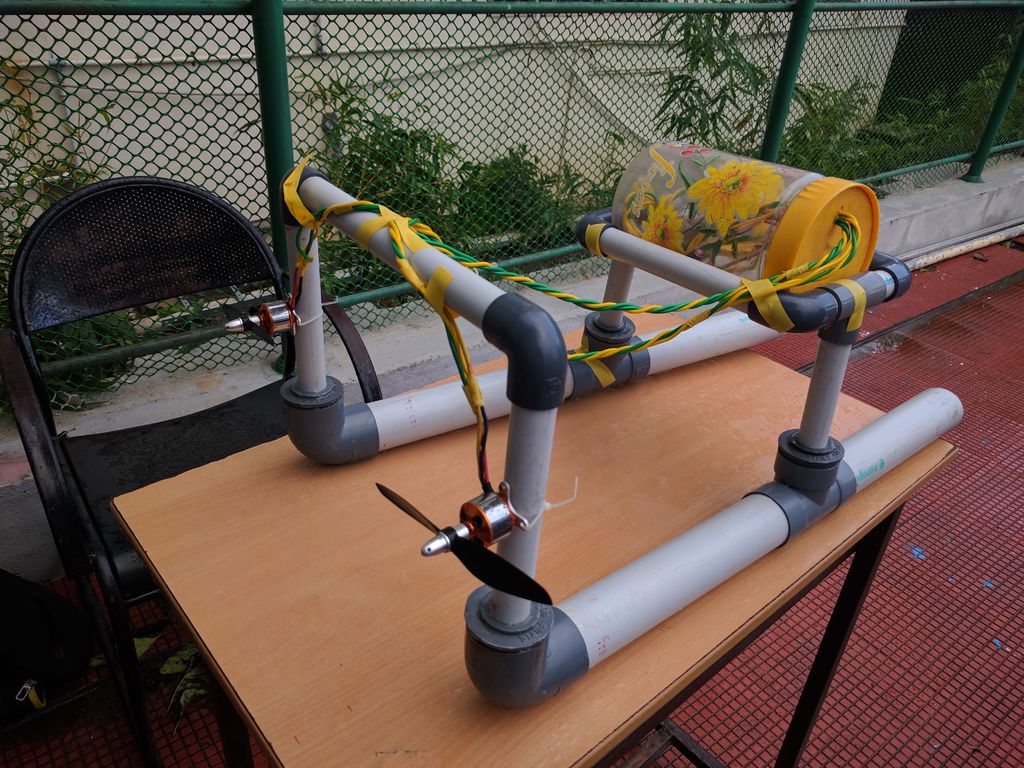
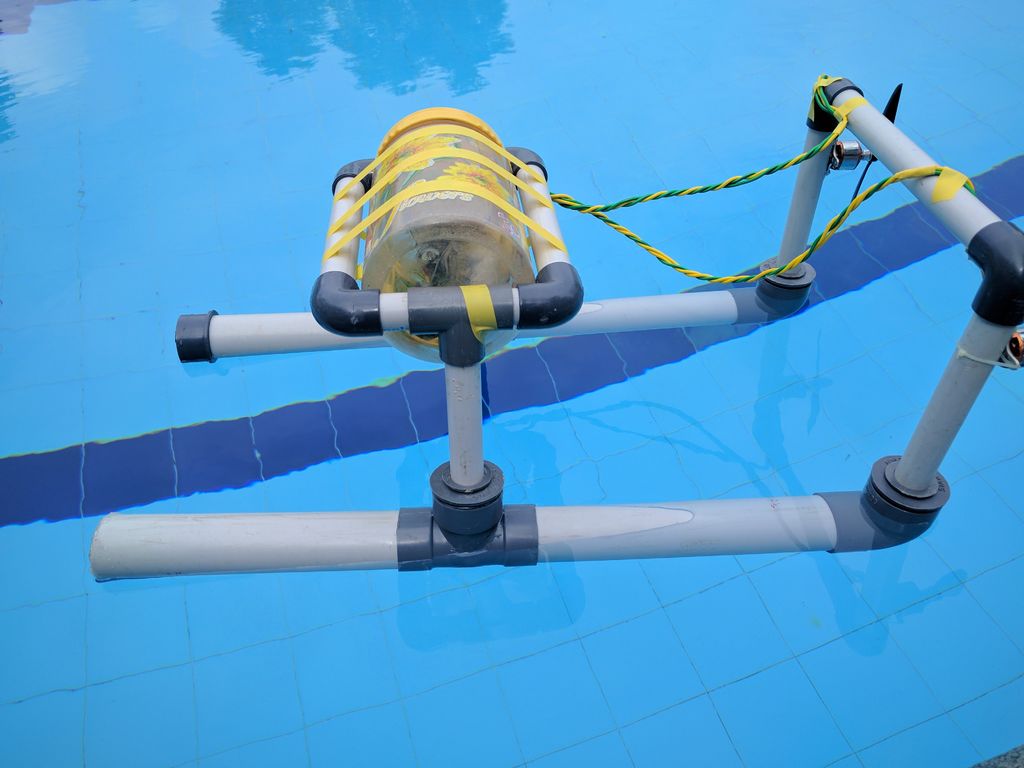
Pontoon
These things in the image are called a pontoon; with the help of these, our boat will float.
First step is making the pontoons.You need to cut the 55mm pipe in half the length of your USV i wanted the length to be 60cm so i cut it to 30cm and joined it by Tjoint which will support my upper structure.Also attach the L joint at the end repeat this to make the other pontoon.
Again, to make your own design, you can use various length,h just make sure it is stable in water.
You dont need to seal the joints with glue just hammer all the caps and joints little bit it will become water tight.
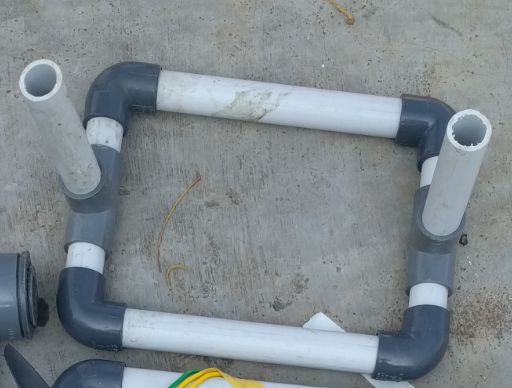
Upper Structure
To keep our electronics safe, we will use a cheap plastic container that you can get it anywhere. You can use a box just make sure water won’t get inside,e just make it splash proof. These things are generally very stable.
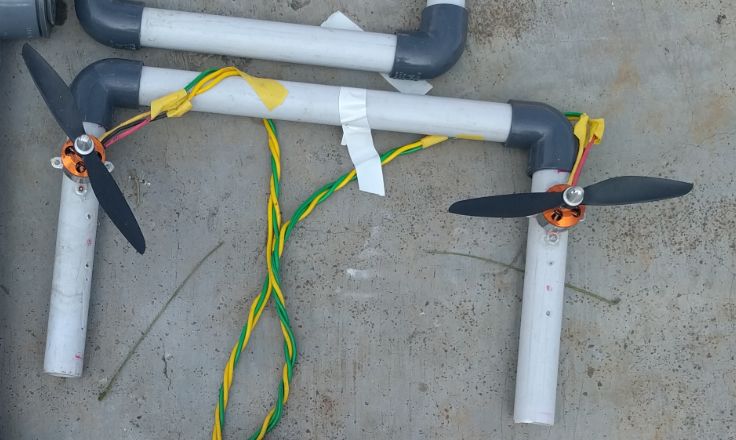
The size of the upper structure has to be decided based on the container in which you will keep your battery, and ESC mine is 15 cm* 10 cm approx. Join the L joint and pipe to make a rectangle as shown height of the supporting struts should be sufficient, 10cm above the water surface to avoid any splashing of water.l ike this, make the back part arch, which will support the motor. The height of this arch will be dependent upon the length of your propeller. Make sure the propeller does not touch water.
If your design is final and you dont want to make any changes Glue the structure together to make it water tight so that water do not go inside the hull. If you want to keep changing it just hammer all the pieces it should be fine glue gun will also work.
Electronic Connections
To attach motors to the boat use the motor mount and screw. Brush less motors comes with mount and screw so no problem there so u just have to select the location and make a hole that it.
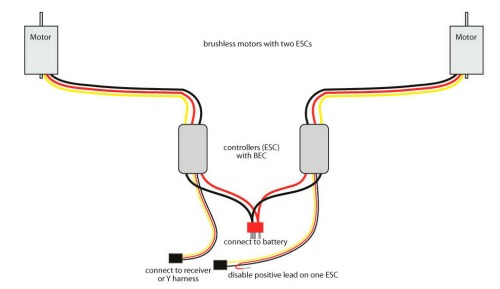
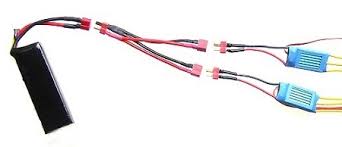
The battery will power the 2 ESCs. Make sure you connect positive with positive and negative with negative terminals only.
Now, both the ESCs will have a set of really thin three wires connected together with female connectors. These wires from ESC will connect to the receiver, which comes with your remote. There is no need to give separate power to the receiver as it will automatically draw power from the connected ESC.
Bind your controller, and you should be ready to go.
Add Camera
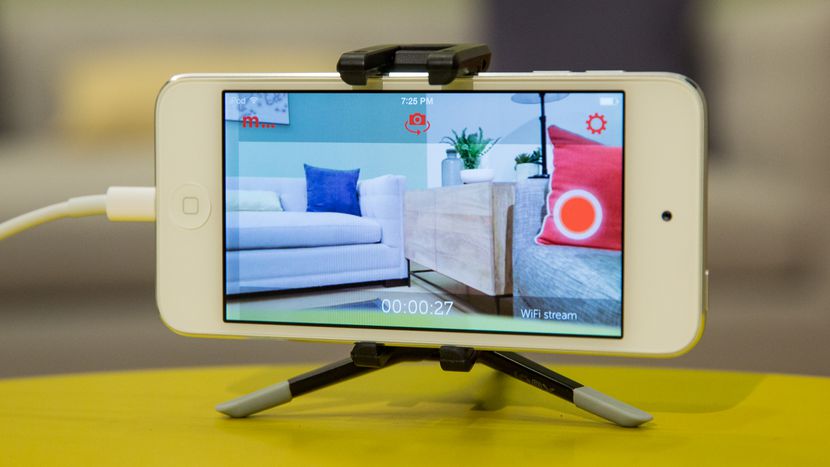
This is an optional step; you can use your spare phone as a camera
- Download the IP camera app from the play store
- Install it
- Run it and connect it to wifi
- Connect your PC or other phone to the same wifi
- Once the app is started, it will give you a link. Just go to that link, and you should see the live video there
This app does not require internet to stream video, it makes a local server and sends video from the phone to wifi network, where anyone can see it by using the link.