How to Install ESP32 in Arduino IDE Latest Method(Windows, Mac OS X, Linux)
When people first hear about the ESP32, it sounds like some futuristic piece of hardware, something reserved for advanced engineers with lab coats and mysterious code. In reality, the ESP32 is simply a tiny, powerful microcontroller made by Espressif Systems. It can do what your basic Arduino boards do, but with built-in Wi-Fi, Bluetooth, and a much faster brain. This makes it perfect for building robots, IoT devices, or even something as playful as an internet-controlled coffee machine.
Before the fun begins, though, you need to make your computer and the Arduino IDE “understand” this new board. The Arduino IDE (Integrated Development Environment) is the software that allows you to write code, compile it, and upload it to your board. Think of it as a bridge between human logic and machine action. Let’s walk step-by-step through installing ESP32 support in the Arduino IDE, while also unpacking why each step matters.
Step 1: Install the Arduino IDE
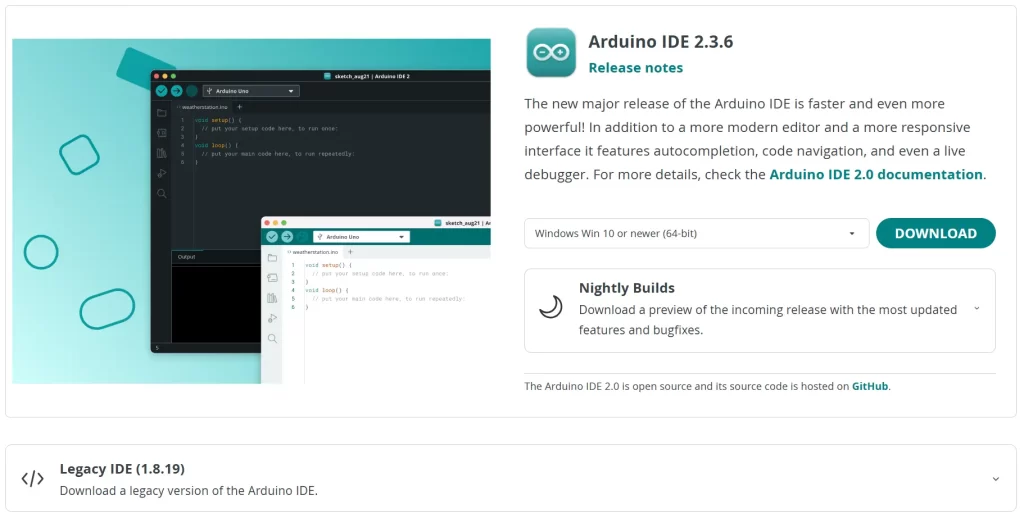
If you’re completely new, start here. The Arduino IDE is available for Windows, macOS, and Linux. You can download it from the official Arduino website.
When you click the download link, you’ll notice different installers. Choose the one that matches your operating system. For example, Windows users might pick “Windows Installer” or “Windows ZIP file,” depending on whether they want an automatic or manual setup.
After downloading, install the IDE using the usual software installation process: open the file, follow the on-screen steps, and let it complete.
Why this step matters:
The IDE is the workspace where all your code will live. It contains the editor, compiler, and uploader — the essential tools to send instructions to your ESP32. Without it, your code is like a letter with no mailbox.
Step 2: Open the Arduino IDE and Set Up the Preferences
Once installed, open the IDE. You’ll see a simple blank window with a few menus on top.
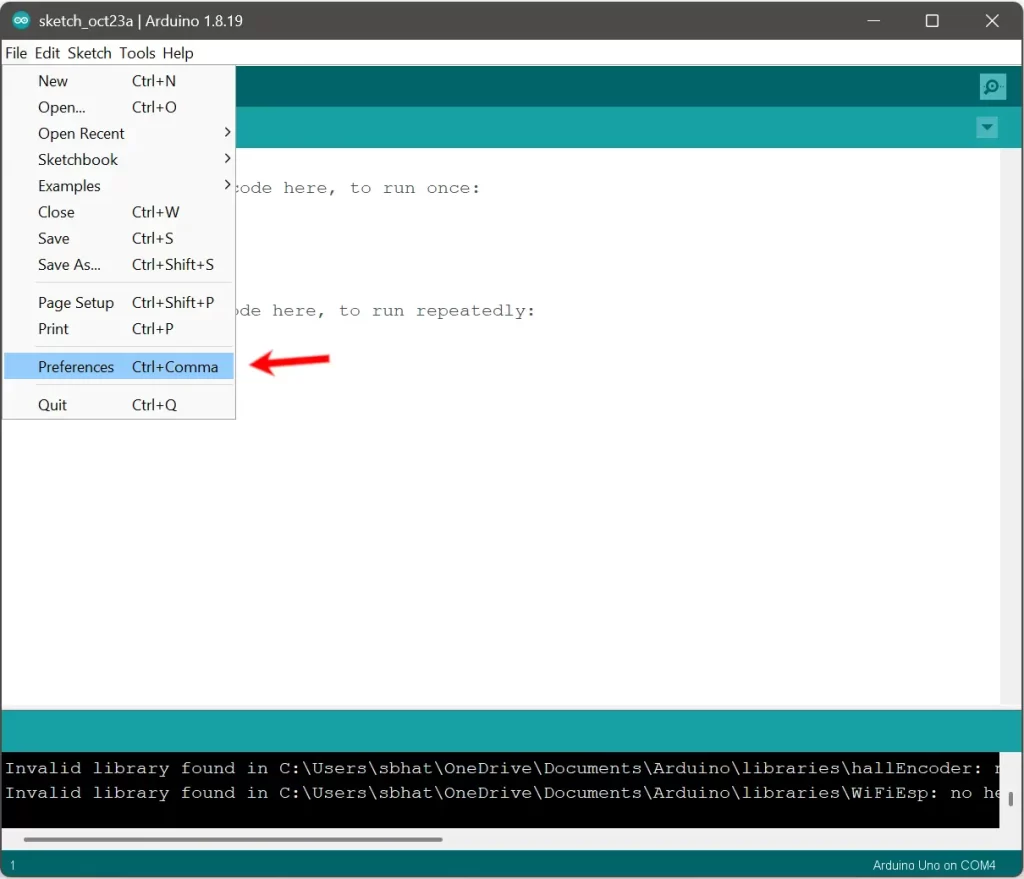
Now, go to File > Preferences (on Windows) or Arduino > Preferences (on macOS).
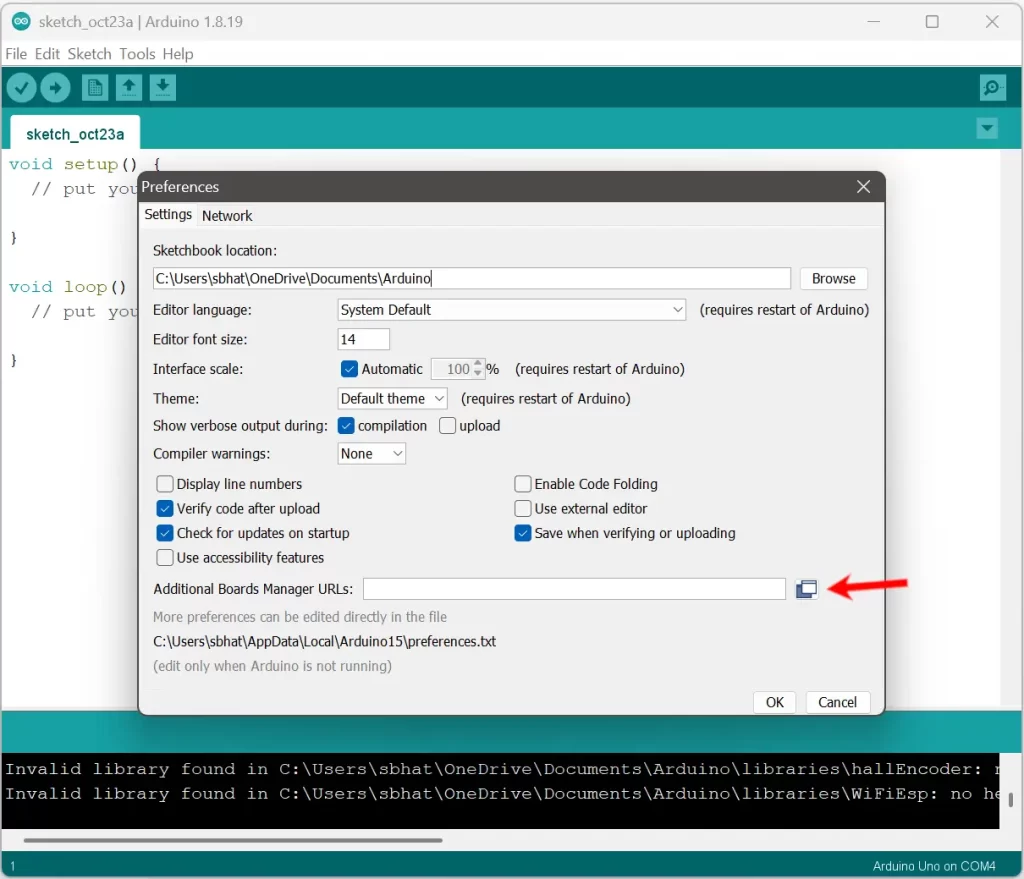
A new dialog box will open. Look for the field labeled “Additional Boards Manager URLs.”
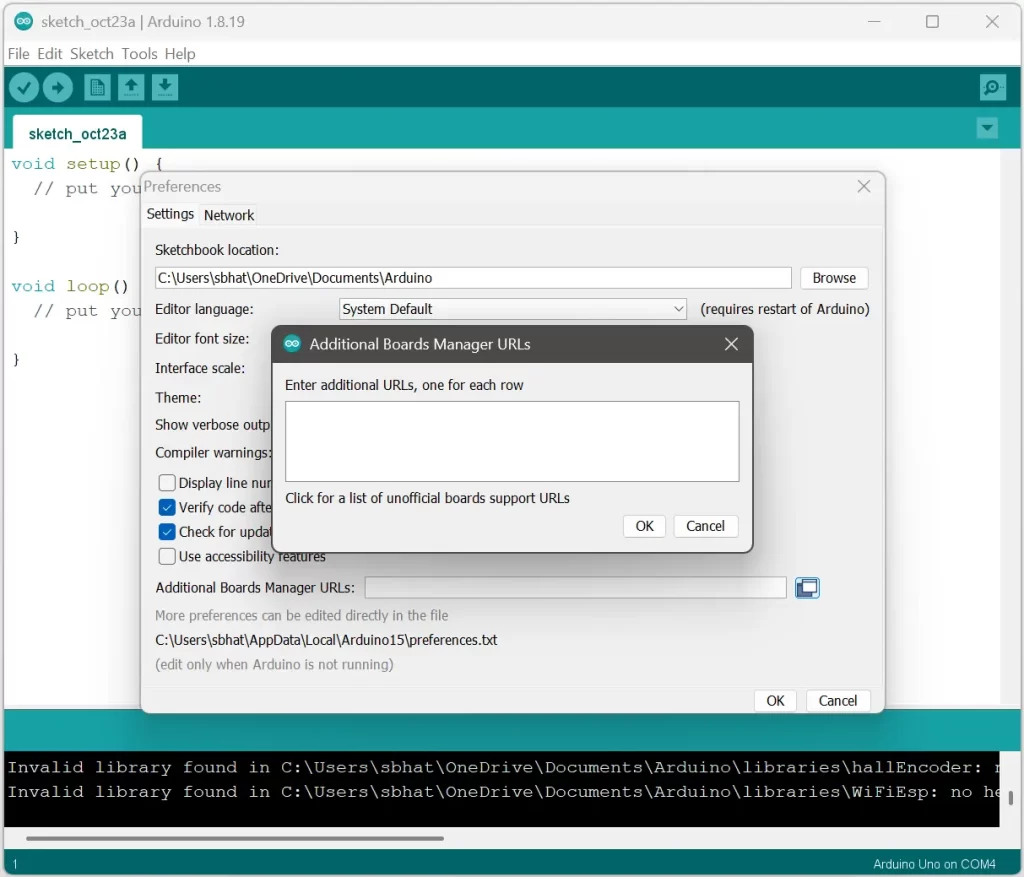
Here’s the key action: copy and paste this link into that field:
https://raw.githubusercontent.com/espressif/arduino-esp32/gh-pages/package_esp32_index.json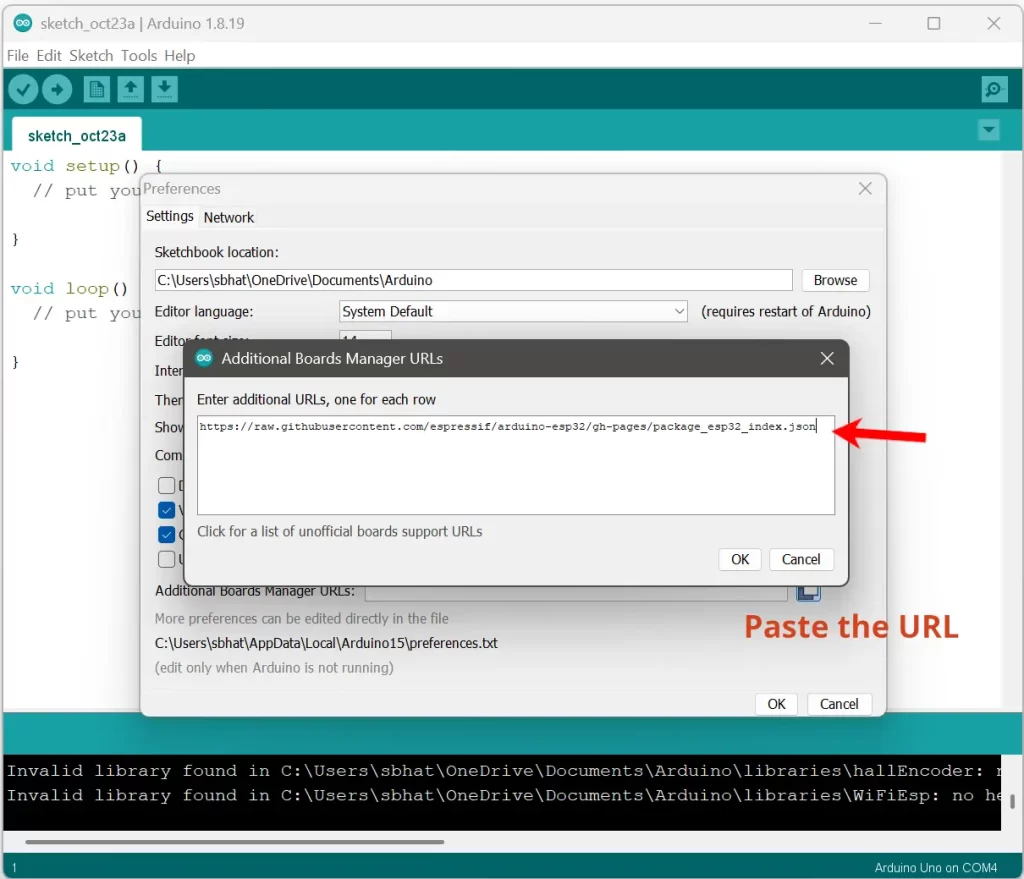
If there’s already something written there, just add a comma, then paste the link after it.
Why this step matters:
By default, the Arduino IDE only knows about the boards made by Arduino itself, like the Uno, Nano, or Mega. The ESP32 comes from a different manufacturer, so the IDE needs to be told where to find the files that describe it. The URL you just added points to a JSON file—a structured data file—that contains everything the IDE needs to know to support ESP32 boards. This action is like giving your IDE a map to a new territory.
Step 3: Open the Boards Manager
Now that the IDE knows where to look, we’ll make it actually download the ESP32 support files.
Go to Tools > Board > Boards Manager. This opens a window listing all the available board packages. In the search bar at the top, type “ESP32.”
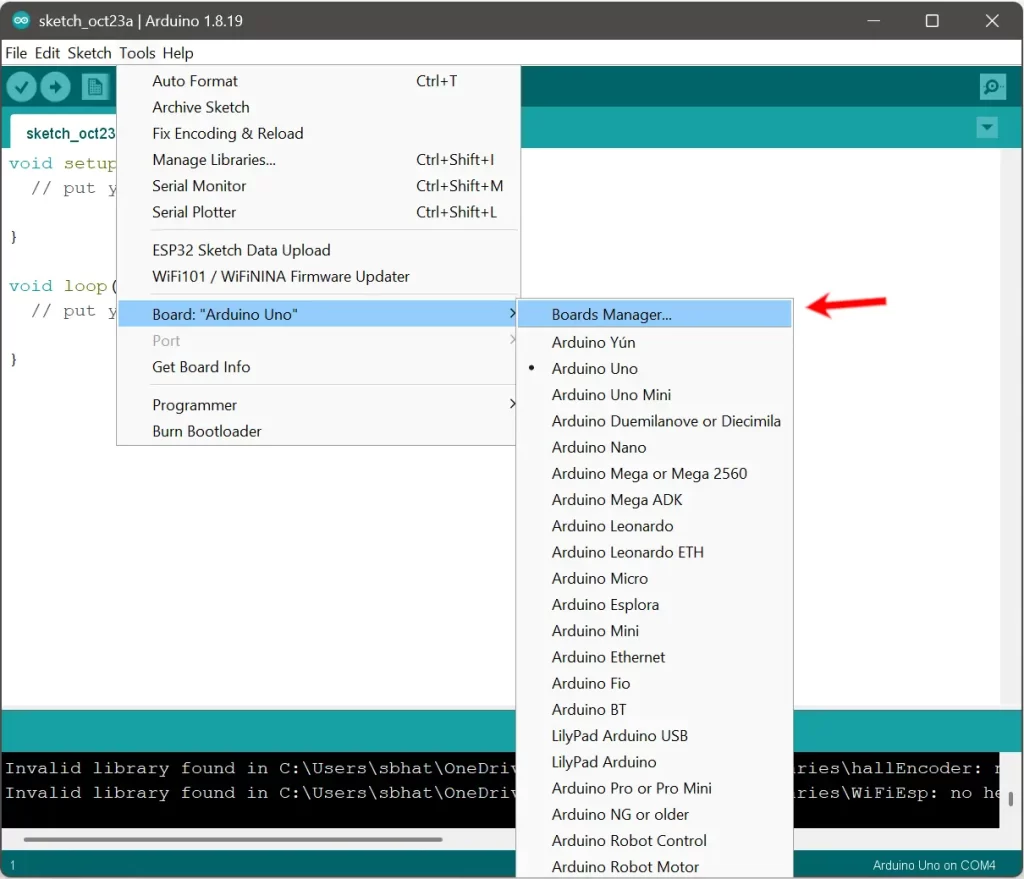
You’ll see an entry called “esp32 by Espressif Systems.” Click Install. Wait for it to finish—it might take a few minutes, depending on your internet connection.


Why this step matters:
This installation downloads all the necessary board definitions, libraries, and compilers for the ESP32. These files teach the Arduino IDE how to compile your sketches into binary code that the ESP32 can understand. It’s like installing a language pack so your computer can “speak ESP32.”
Step 4: Select Your ESP32 Board
Once the installation is done, close the Boards Manager. Now go to Tools > Board > ESP32 Arduino and select your specific ESP32 model.
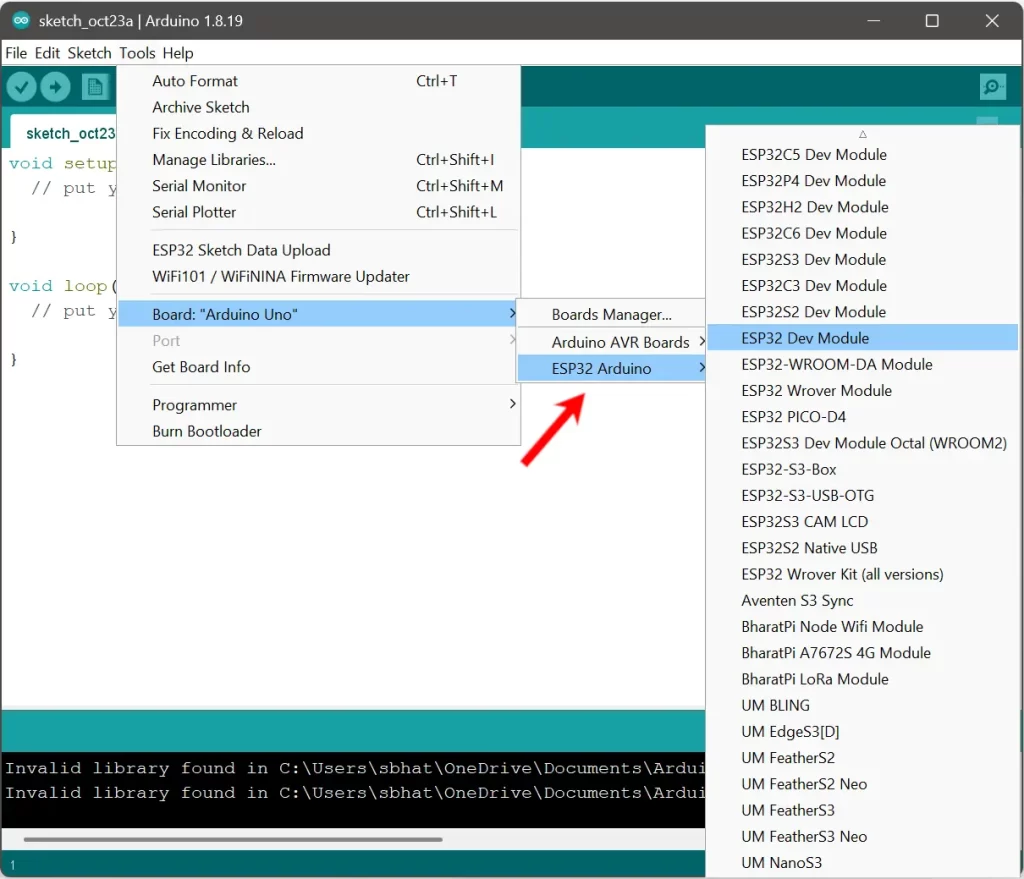
If you’re unsure which one you have, look at the label printed on your board or check the product page where you bought it. Common options include “ESP32 Dev Module” or “DOIT ESP32 DEVKIT V1.”
Why this step matters:
Each board has a slightly different configuration—different pin mappings, flash memory sizes, and chip variations. Choosing the right one ensures that when you upload your code, it aligns perfectly with your hardware.
Step 5: Connect Your ESP32 to the Computer
Use a USB cable (typically a micro-USB or USB-C) to connect your ESP32 board to your computer.
In the IDE, open Tools > Port and choose the port corresponding to your board. Usually, it’s something like “COM3” on Windows or “/dev/cu.SLAB_USBtoUART” on macOS.
If you don’t see any port, you might need to install a USB driver. Many ESP32 boards use a CP210x or CH340 USB-to-Serial chip. You can find the driver by searching for those names on your manufacturer’s website.
Why this step matters:
Your computer communicates with the ESP32 through a serial port. Without the proper driver, your operating system won’t recognize the board, and you won’t be able to upload programs to it.
Step 6: Test with the Blink Sketch
Now for the satisfying part — let’s make something blink. Go to File > Examples > Basics > Blink.
This sketch is the “Hello World” of microcontrollers. It makes an LED turn on and off repeatedly. However, the built-in LED on most ESP32 boards is connected to pin 2, not pin 13 like on Arduino Uno. So before uploading, find this line in the code:
int led = 13;
Change it to:
int led = 2;
Then click the Upload button (the arrow icon in the top left). Wait for the IDE to compile and upload the code. You might see the board’s LED start blinking after a few seconds.
Why this step matters:
This small exercise confirms that your IDE, board drivers, and serial connection are all working correctly. The blinking LED is the first handshake between your code and your hardware—a visual proof that your setup is alive.
Step 7: Troubleshooting Common Problems
If something doesn’t work, don’t panic. Errors are not the end; they’re the beginning of understanding.
If the IDE says it can’t find the port, reinstall the USB driver. If the upload fails, press and hold the BOOT button on the ESP32 while uploading—some boards require this. If compilation fails, double-check that the correct board and port are selected.
In debugging, patience is your best tool. Every error message is a clue; it tells you where to look next.
Closing Thoughts
Installing the ESP32 in the Arduino IDE is less about following a list of instructions and more about understanding the ecosystem of tools that make programming microcontrollers possible. Each step—from adding the board manager URL to blinking that first LED—reveals how open-source platforms like Arduino bridge complex engineering with accessible learning.
Once this setup is complete, the door opens wide: you can connect sensors, control motors, send data over Wi-Fi, or even create your own robotic companion. The ESP32 is more than a microcontroller; it’s a gateway to making the invisible logic of code move in the physical world.
The beauty of it lies in this translation—from thought to circuit, from idea to motion. And that journey, one